Mussagl Manual v1.0
Brandon W. King
Last updated: Oct 31st, 2006
- Status
- Introduction
- Getting Mussagl
- Obtaining Input Data
- Using Mussagl
- Understanding Mussa
Status
Features to be Implemented
For an up-to-date list of features to be implemented visit: http://woldlab.caltech.edu/cgi-bin/mussa/roadmap
Introduction
What is Mussagl?
Mussa is an N-way version of the FamilyRelations (which is a part of the Cartwheel project) 2-way comparative sequence analysis software. Given DNA sequence from N species, Mussa uses all possible pairwise comparions to derive an N-wise comparison. For example, given sequences 1,2,3, and 4, Mussa makes 6 2-way comparisons: 1vs2, 1vs3, 1vs4, 2vs3, 2vs4, and 3vs4. It then compares all the links between these comparisons, saving those that satisfy a transitivity requirement. The saved paths are then displayed in an interactive viewer.
Short History of Mussa
Mussa Python/PMW Prototype
First Python/PMW based prototype.
Mussa C++/FLTK
A rewrite for speed purposes using C++ and FLTK GUI toolkit.
Mussagl C++/Qt/OpenGL
Refactored version using the more elegant Qt GUI framework and OpenGL for hardware acceleration for those who have better graphics cards.
Getting Mussagl
License
Mussagl has been released open source under the GPL v2 license.
Platforms
You have the option of building from source or downloading prebuilt binaries. Most people will want the prebuilt versions.
Supported Platforms:
- Mac OS X (binary or source)
- Windows XP (binary or source)
- Linux (source)
Download
Mussagl in binary form for OS X and Windows and/or source can be downloaded from http://mussa.caltech.edu/.
Install
Mac OS X
- Download .dmg file.
- Double click on .dmg file.
- Drag Mussa icon to your /Applications folder.
- Double Click on Mussa icon to open program.
Windows XP
Once you have downloaded the Mussagl installer, double click on the installer and follow the install instructions.
To start Mussagl, launch the program from Start > Programs > Mussagl > Mussagl.
Linux
Currently we do not have a binary installer for Linux. You will have to build from source. See the 'build from source' section below.
Build from Source
Instructions for building from source can be found build page on the Mussa wiki.
Obtaining Input Data
If you would like help obtaining data for use with Mussagl, you can skip ahead to the Obtaining Input Data - Continued section.
If would like a tour of the software, continue with the Using Mussagl section.
Using Mussagl
Create/Load Analysis
Currently there are three ways to load a Mussa experiment.
Create a new analysis
To create a new analysis select 'Define analysis' from the 'File' menu. You should see a dialog box similar to the one below. For this demo we will use the example sequences that come with Mussagl.
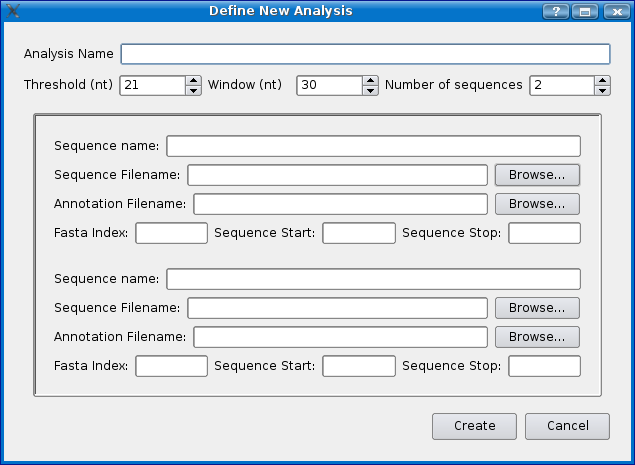
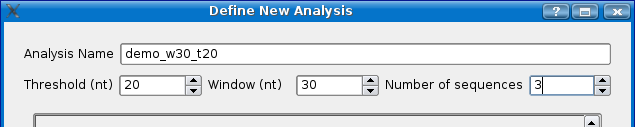
Instructions:
- Give the experiment a name, for this demo, we'll use 'demo_w30_t20'. Mussa will create a folder with this name to store the analysis files in once it has been run.
- Choose a threshold... for this demo choose 20. See the Threshold section for more detailed information.
- Choose a window size. For this demo choose 30.
- Choose the number of sequences you would like. For this demo choose 3.
First enter the species name of "Human" in the first "Species" text box. Now click on the 'Browse' button next to the sequence input box and then select /examples/seq/human_mck_pro.fa file. Do the same in the next two sequence input boxes selecting mouse_mck_pro.fa and rabbit_mck_pro.fa as shown below. Make sure to give them a species name as well. Note that you can create annotation files using the mussa Annotation File Format to add annotations to your sequence.
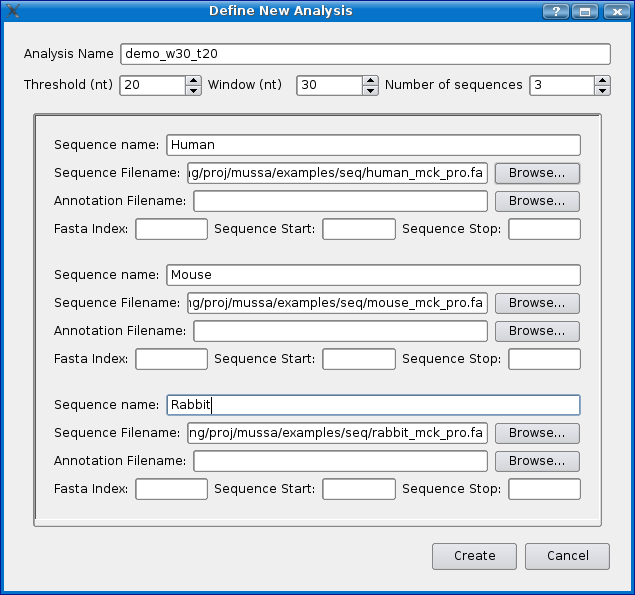
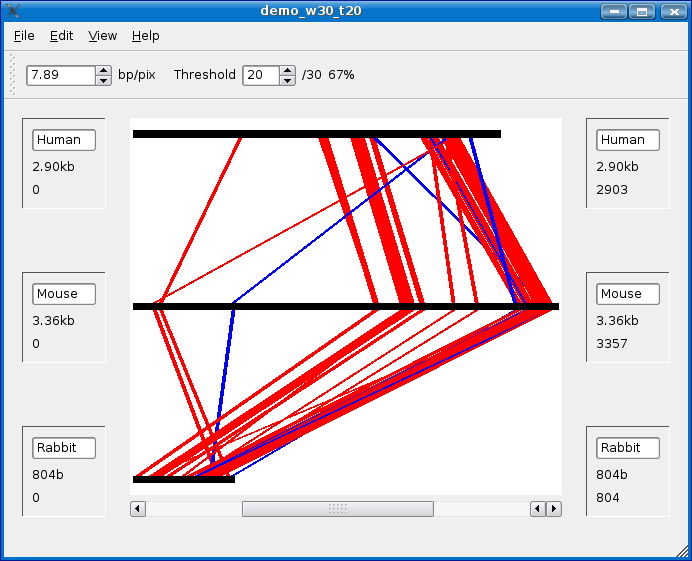
Click the create button and in a few moments you should see something similar to the following screen shot.
By default your analysis is NOT saved. If you try to close an analysis without saving, you will be prompted with a dialog box asking you if you would like to save your analysis. The Saving section for details on saving your analysis. When saving, choose directory and give the analysis the name demo_w30_t20. If you close and reopen Mussagl, you will then be able to load the saved analysis. See Load an analysis section below for details.
Load a mussa parameter file
If you prefer, you can define your Mussa analysis using the Mussa parameter file. See the Parameter File Format section for details on creating a .mupa file.
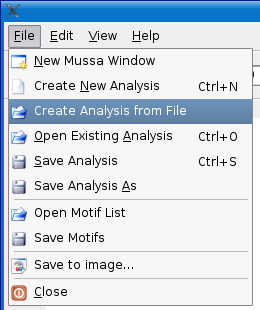
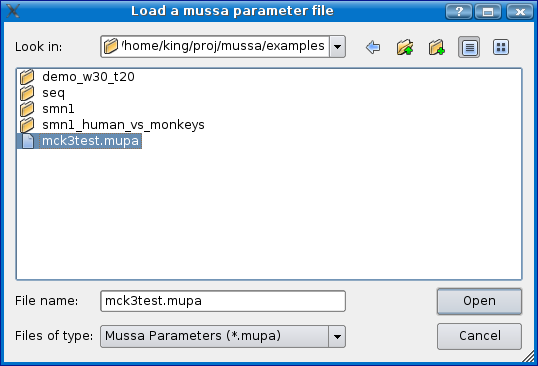
Once you have a .mupa file created, load Mussagl and select the File > Create Analysis from File menu option. Select the .mupa file and click open.
If you would like to see an example, you can load the mck3test.mupa file in the examples directory that comes with Mussagl or read the Step 5 - Create Analysis section from the Obtaining Input Data - Continued section.
Load an analysis
To load a previously run analysis open Mussagl and select the File > Open Existing Analysis menu option. Select an analysis directory and click open.

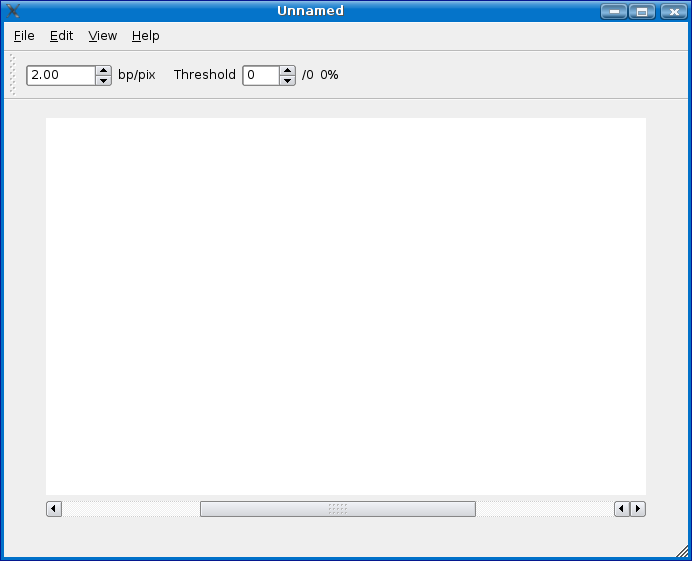
Main Window
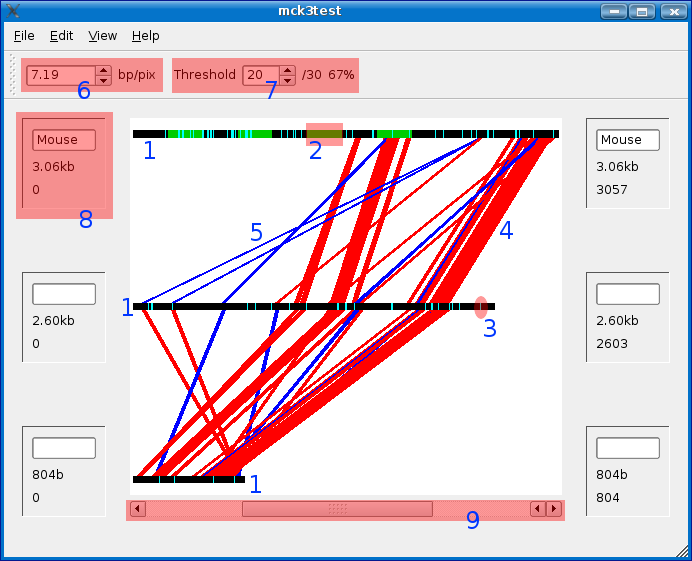
DNA Sequence (black bars)

Each of the black bars represents one of the loaded sequences, in this case the sequence around the gene 'MCK' in human, mouse, and rabbit.
Annotation

Annotation shown in green on sequence bar.
Annotations can be included on any of the sequences using the Load a mussa parameter file or Create a new analysis method of loading your sequences. You can define annotations by location or using an exact sub-sequence or a FASTA sequence of the section of DNA you wish to annotate. See the Annotation File Format section for details.
Motif

Motif shown in light blue on sequence bar.
The only real difference between an annotation and motif in Mussagl is that you can define motifs and choose a color from within the GUI. See the Motifs section for more information.
Red conservation tracks
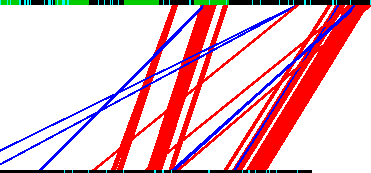
Conservations tracks shown as red and blue lines between sequence bars.
The red lines between the sequence bars represent conservation between the sequences (i.e. not reverse complement matches)
The amount of sequence conservation shown will depend on how much your sequences are related and the dynamic threshold you are using.
To deselect, click and drag over any white area and then release the mouse button.
Blue conservation tracks
Conservations tracks shown as red and blue lines between sequence bars.
Blue lines represent reverse complement conservation relative to the sequence attached to the top of the blue line.
The amount of sequence conservation shown will depend on how much your sequences are related and the dynamic threshold you are using.
To deselect, click and drag over any white area and then release the mouse button.
Zoom Factor
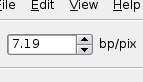
The zoom factor represents the number of base pairs represented per pixel. When you zoom in far enough the sequence will switch from seeing a black bar, representing the sequence, to the actual sequence (well, ASCII representation of sequence).
Dynamic Threshold

You can dynamically change the threshold for how strong a match you consider the conservation to be by changing the value in the dynamic threshold box.
The value you enter is the minimum number of base pairs that have to be matched in order to be considered conserved. The second number that you can't change is the window size you used when creating the experiment. The last number is the percent match.
Below is an animation of the dynamic threshold being increased over time.
See the Threshold section for more information.
Sequence Information Bar
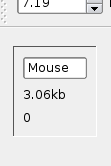
The sequence information bars can be found to the left and right sides of Mussagl. Next to each sequence you will find the following information:
- Species (If it has been defined)
- Total Size of Sequence
- Current base pair position
Note that you can update the species text box. Make sure to save your experiment after making this change by selecting File > Save Analysis from the menu.
Sequence Scroll Bar

The scroll bar allows you to scroll through the sequence which is useful when you have zoomed in using the zoom factor.
Saving
Save on Close
When ever you create a new analysis or make a change such as adding/editing a motif or changing a species name, an asterisk (*) will appear in the title of the window showing that there are changes that have not been saved. If you close a Mussa window without saving changes, Mussa will ask you if you would like to save the changes that have been made.
Save Analysis
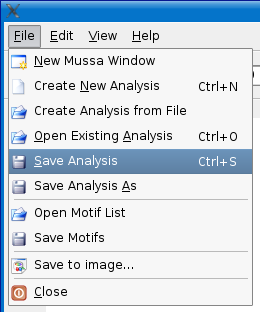
After making changes, such as updating species names or adding/editing motifs, you can save these changes by selecting the File > Save analysis menu option or pressing CTRL + S (PC) or Apple/Command Key + S (on Mac).
Save Analysis As
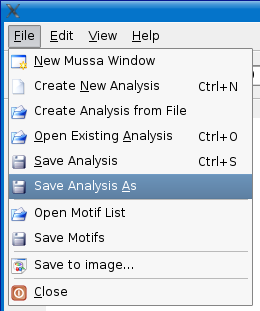
To save a copy of your analysis to a new location, select the File > Save analysis as menu option and choose a new location and name for your analysis.
Save Motif List
See Save Motifs to File in the Motifs section.
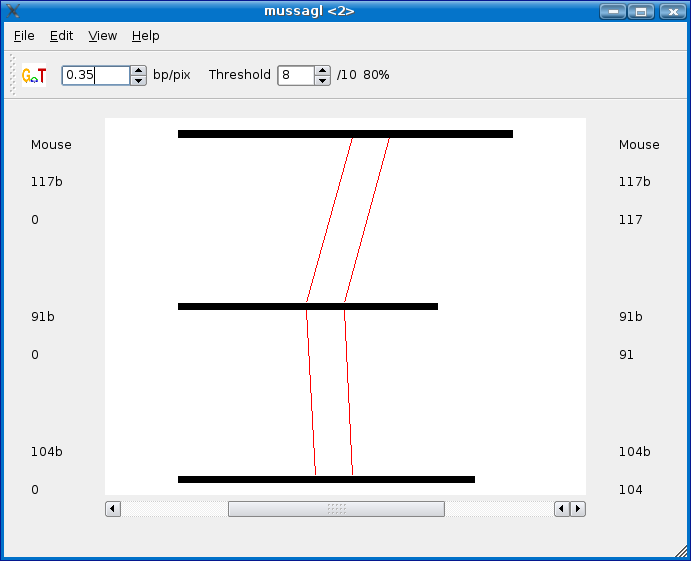
Viewing Multiple Analyses
Some times it is useful to view more than one analysis at a time. To do accomplish this, Mussa allows you to open a new Mussa window by selecting the File > New Mussa Window menu option.
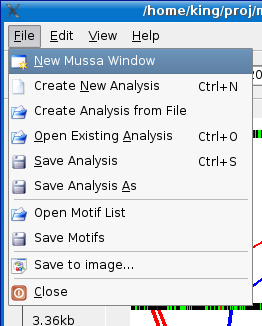
A new Mussa window will pop up.
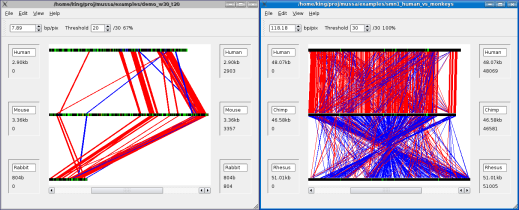
A new Mussa window on the right, in which a second analysis has been loaded.
Now you can create or load an existing analysis, in this new window, as described in the Create/Load Analysis section.
You can view as many analyses as you can fit on your screen or until you run out of available RAM. If you notice a rapid decrease in performance and hear lots of noise coming from your hard drive, you probably ran out of RAM and are now using virtual memory (i.e. much much slower). If this happens, you may need to avoid opening as many analyses at one time.
Annotations / Motifs
Annotations
Currently annotations can be added to a sequence using the mussa annotation file format and can be loaded by selecting the annotation file when defining a new analysis (see Create a new analysis section) or by defining a .mupa file pointing to your annotation file (see Load a mussa parameter file section).
Motifs
Load Motifs from File
It is possible to load motifs from a file which was saved from a previous run or by defining your own motif file. See the Motif File Format section for details.
NOTE: Valid motif list file extensions are:
- .mtl
- .txt
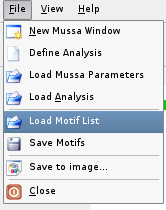
To load a motif file, select Load Motif List item from the File menu and select a motif list file.
Save Motifs to File
Motifs from the Motif Dialog can be saved to file for use with other analyses. If you just want your motifs to be saved with your analysis, see the save analysis section for details.
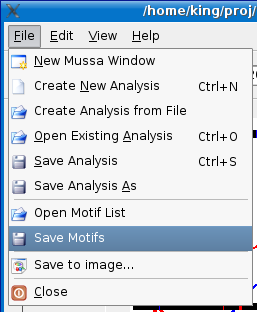
To save a motif list, select File > Save Motifs menu option. By default, Mussa will append .mtl if you do not provide a file extension (valid file extensions: .mtl & .txt).
Motif Dialog
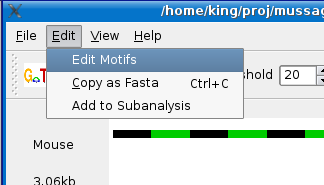
Mussa has the ability to find lab motifs using the IUPAC Nucleotide Code for defining a motif. To define a motif, select Edit > Edit Motifs menu item as shown below.
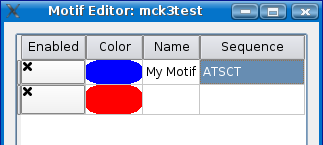
You will see a dialog box appear with a "apply" button in the bottom right and one rows for defining motifs and the color that will be displayed on the sequence. When you start adding your first motif, an additional row will be added. The check box in the first column defines whether the motif is displayed or not. The second column is the motif display color. The third column is for the name of your motif and finally, the fourth column is motif itself.
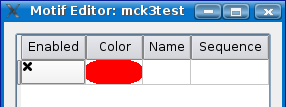
Now let's make a motif 'AT[C or G]CT'. Using the IUPAC Nucleotide Code, type in 'ATSCT' into the motif field and 'My Motif' for the name in the name field as shown below.
Notice how a second row appeared when you started to add the first motif. Every time you add a new motif, a new row will appear allowing you to add as many motifs as you need.
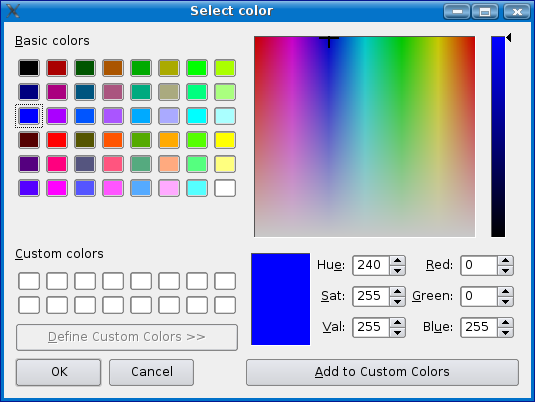
Now choose a color for your motif by clicking on the colored area to the left of the name field. Remember to choose a color that will show up well with a black bar as the background. A good tool for picking a color is the Colour Contrast Analyser by juicystudio.com.
Once you have selected the color for your motif, click on the 'apply' button. Notice that if Mussa finds matches to your motif will now show up in the main Mussa window.
Before Motif:

After Motif:

To save your motifs with your analysis, see the save analysis section. To save your motifs to a file, see the save motifs to file section.
Deleting a Motif
To delete a motif, remove all text from the name and sequence columns and close the motif editor.
View Mussa Alignments
Mussagl allows you to zoom in on Mussa alignments by selecting the set of alignment(s) of interest. To do this, move the mouse near the alignment you are interested in viewing and then PRESS and HOLD the LEFT mouse button and drag the mouse to the other side of the conservation track so that you see a bounding box overlaping the alienment(s) of interest and then let go of the left mouse button.
In the example below, I started by left-clicking on the area marked by a red dot (upper left corner of bounding box) and dragging the mouse to the area marked by a blue dot (lower right corner of the bounding box) and letting go of the left mouse button.
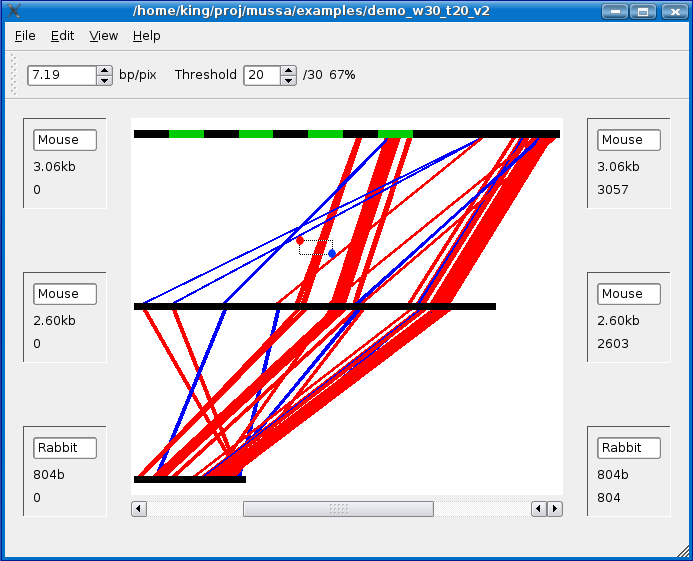
All of the lines which were not selected should be washed out as shown below:
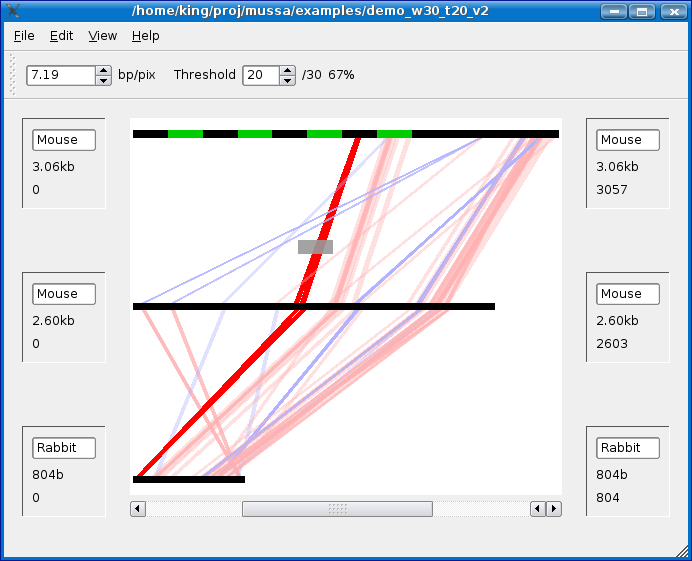
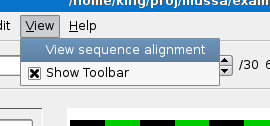
With a selection made, goto the View menu and select View mussa alignment.
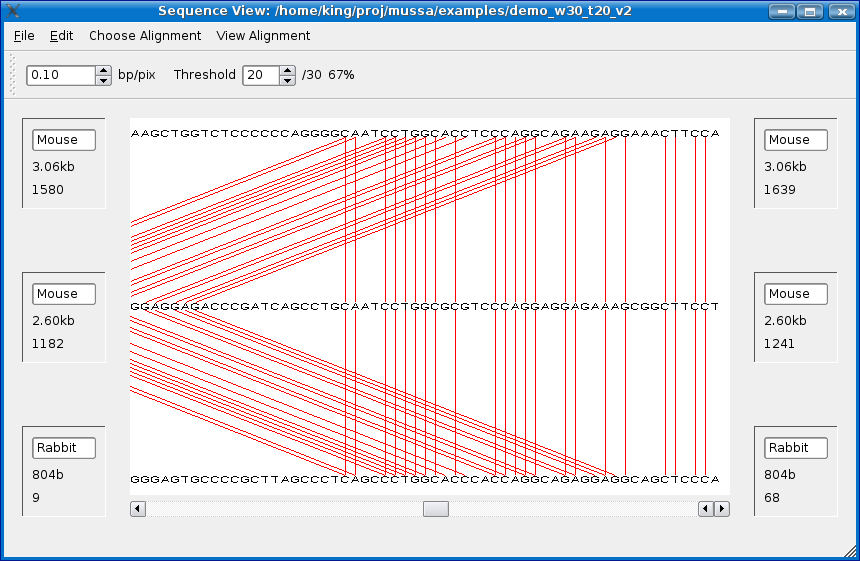
You should see the alignment at the base-pair level as shown below.
Sub-analysis
Sub-analysis was created to allow you to analyze a sub-region using different parameters. This may allow you to find matches which may not have shown up with your initial settings.
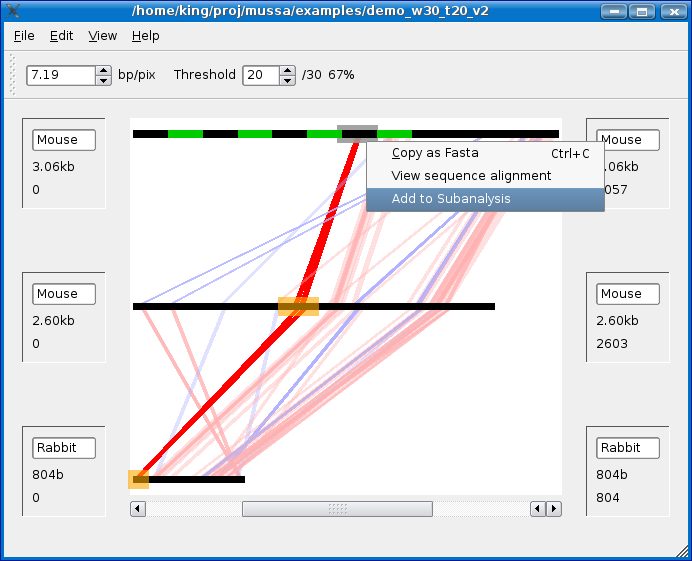
To run a sub-analysis highlight a section of sequence and right click on it and select Add to subanalysis. To the same for the sequences shown in orange in the screenshot below. Note that you are NOT limited to selecting only one subsequence from the same sequence.
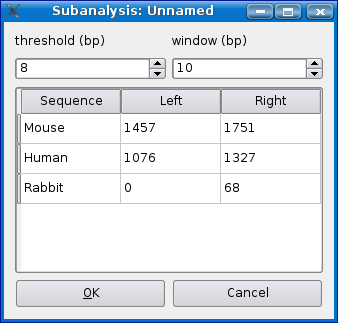
Once you have added your sequences for subanalysis, choose a window size and threshold and click Ok.
A new Mussa window will appear with the subanalysis of your sequences once it's done running. This may take a while if you selected large chunks of sequence with a loose threshold.
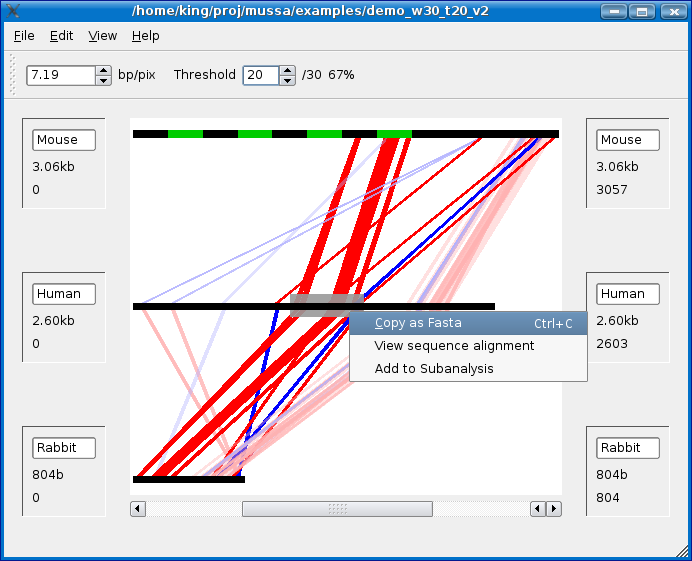
Copying sequence to clipboard
To copy a sequence to the clipboard, highlight a section of sequence, as shown in the screen shot below, and do one of the following:
- Select Copy as FASTA from the Edit menu.
- Right-Click (Left-click + Apple/Command Key on Mac) on the highlighted sequence and select Copy as FASTA.
- Press Ctrl + C (on PC) or Apple/Command Key + C (on Mac) on the keyboard.
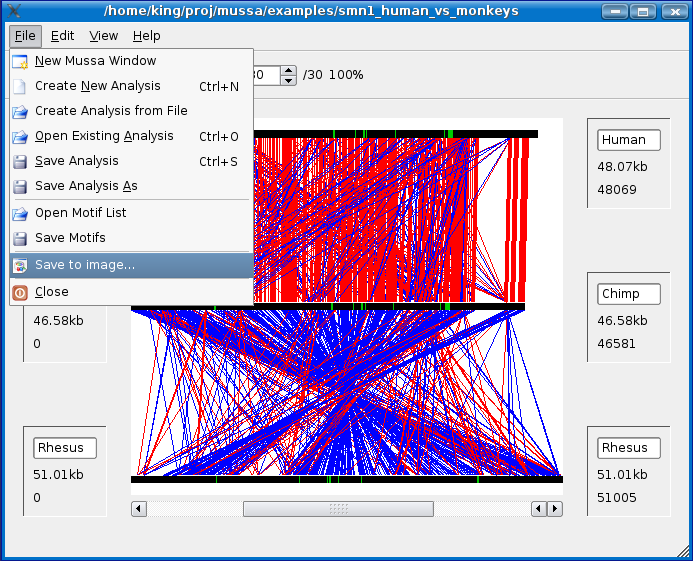
Saving to an Image
To save your current mussa view to an image, select File > Save to image... as shown below.
You can define the width and the height of the image to save. By default it will use the same size of your current view. Since the Mussa view is implemented using vectors, if you choose a larger size then your current view, Mussa will redraw at the higher resolution when saving. In other words, you get higher quality images when saving at a higher resolution.
If you check the "Lock aspect ratio" check box, which I have circled in red, then when you change one value, say width, the other, height, will update automatically to keep the same aspect ratio.
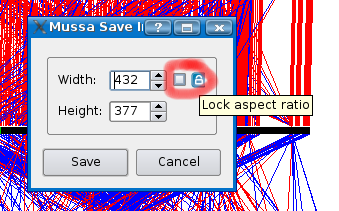
Click save and choose a location and filename for your file.
The valid image formats are:
- .png (default if no extension specified.)
- .jpg
Detailed Information
Threshold
The threshold of an analysis is in minimum number of base pair matches must be meet to in order to be kept as a match. Note that you can vary the threshold from within Mussagl. For example, if you choose a window size of 30 and a threshold of 20 the mussa nway transitive algorithm will store all matches that are 20 out of 30 bp matches or better and pass it on to Mussagl. Mussagl will then allow you to dynamically choose a threshold from 20 to 30 base pairs. A threshold of 30 bps would only show 30 out of 30 bp matches. A threshold of 20 bps would show all matches of 20 out of 30 bps or better. If you would like to see results for matches lower than 20 out of 30, you will need to rerun the analysis with a lower threshold.
Window Size
The typical sizes people tend to choose are between 20 and 30. You will likely need to experiment with this setting depending on your needs and input sequence.
Sequences
Mussa reads in sequences which are formatted in the FASTA format. Mussa may take a long time to run (>10 minutes) if the total bp length near 280Kb. Once mussa has run once, you can reload previously run analyzes.
FIXME: We have learned more about how much sequence and how many to put in Mussagl, this information should be documented here.
Mussa File Formats
Parameter File Format
Note that for the comment character '#' to work, it must contain a space after it (i.e. '# ').
File Format (.mupa):
# name of analysis directory and stem for associated files
ANA_NAME <analysis_name>

# if APPEND vars true, a _wXX and/or _tYY added to analysis name
# where XX = WINDOW and YY = THRESHOLD
# Highly recommeded with use of command line override of WINDOW or THRESHOLD
APPEND_WIN <true/false>
APPEND_THRES <true/false>

# first sequence info
SEQUENCE <FASTA_file_path>
ANNOTATION <annotation_file_path>
SEQ_START <sequence_start>

# the second sequence info
SEQUENCE <FASTA_file_path>
# ANNOTATION <annotation_file_path>
SEQ_START <sequence_start>
# SEQ_END <sequence_end>

# third sequence info
SEQUENCE <FASTA_file_path>
# ANNOTATION <annotation_file_path>

# analyzes parameters: command line args -w -t will override these
WINDOW <num>
THRESHOLD <num>
| Option Name | Value | Default | Required | Description |
|---|---|---|---|---|
| ANA_NAME | string | N/A | true | Name of analysis (Also name of directory where analysis will be saved. |
| APPEND_WIN | true/false | ? | ? | Appends _w## to ANA_NAME |
| APPEND_THRES | true or false | ? | ? | Appends _t## to ANA_NAME |
| SEQUENCE | /FASTA/filepath.fa | N/A | true | Absolute/Relative file path to sequence. |
| ANNOTATION | /annotation/filepath.txt | N/A | false | Optional annotation file. See annotation file format section for more information. |
| SEQ_START | integer | 1 | false | Optional index into FASTA file |
| SEQ_END | integer | 1 | false | Optional index into FASTA file |
| WINDOW | integer | N/A | true | Window Size |
| THRESHOLD | integer | N/A | true | Threshold |
Annotation File Format
The first line in the file is the sequence name. Each line there after is a space separated annotation.
Update:
- The annotation format now supports FASTA sequences embedded in the annotation file as shown in the format example below. Mussagl will take this sequence and look for an exact match of this sequence in your sequences. If a match is found, it will label it with the name of from the FASTA header.
Format:
<species/sequence_name>
<start> <stop> <annotation_name> <annotation_type>
<start> <stop> <annotation_name> <annotation_type>
<start> <stop> <annotation_name> <annotation_type>
<start> <stop> <annotation_name> <annotation_type>
>FASTA Header
ACTGACTGACGTACGTAGCTAGCTAGCTAGCACG
ACGTACGTACGTACGTAGCTGTCATACGCTAGCA
TGCGTAGAGGATCTCGGATGCTAGCGCTATCGAT
ACGTACGGCAGTACGCGGTCAGA
<start> <stop> <annotation_name> <annotation_type>
...
Example:
Mouse
251 500 Glorp Glorptype
751 1000 Glorp Glorptype
1251 1500 Glorp Glorptype
>My favorite DNA sequence
GATTACA
1751 2000 Glorp Glorptype
Motif File Format
Format:
<motif> <optional name> <red> <green> <blue> <optional alpha>
Example:
AGTGAG "My First Motif" 0.333333 0.588235 1 1
ATGAT "2nd Motif" 1 0 0 1
IUPAC Nucleotide Code
For your convenience, below is a table of the IUPAC Nucleotide Code.
The following table is table 1 from "Nomenclature for Incompletely Specified Bases in Nucleic Acid Sequences" which can be found at http://www.chem.qmul.ac.uk/iubmb/misc/naseq.html.
| Symbol | Meaning | Origin of designation |
|---|---|---|
| G | G | Guanine |
| A | A | Adenine |
| T | T | Thymine |
| C | C | Cytosine |
| R | G or A | puRine |
| Y | T or C | pYrimidine |
| M | A or C | aMino |
| K | G or T | Keto |
| S | G or C | Strong interaction (3 H bonds) |
| W | A or T | Weak interaction (2 H bonds) |
| H | A or C or T | not-G, H follows G in the alphabet |
| B | G or T or C | not-A, B follows A |
| V | G or C or A | not-T (not-U), V follows U |
| D | G or A or T | not-C, D follows C |
| N | G or A or T or C | aNy |
Obtaining Input Data - Continued
If you already have your data, may want to go to the Using Mussagl section of the manual.
Let's say you have a gene of interest called 'SMN1' and you want to know how the sequence surrounding the gene in multiple species is conserved. Guess what, that's what we are going to do, retrieve the DNA sequence for SMN1 and prepare it for using in Mussa.
For more information about SMN1 visit NCBI's OMIM.
The SMN1 data retrieved in this section can be downloaded from the Mussa Example Data page if you prefer to skip this section of the manual.
UCSC Genome Browser Method
There are many methods of retrieving DNA sequence, but for this example we will retrieve SMN1 through the UCSC genome browser located at http://genome.ucsc.edu/.
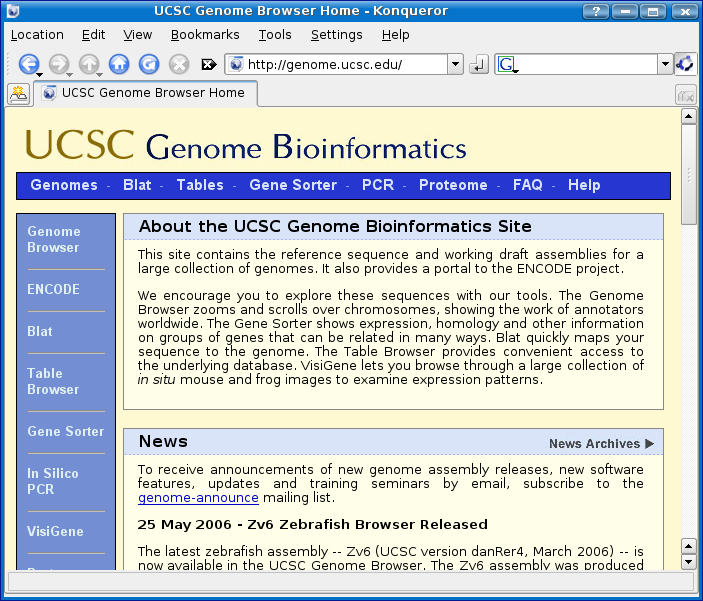
Step 1 - Find SMN1
The first step in finding SMN1 is to use the Gene Sorter menu option which I have highlighted in orange below:

Gene Sorter page:

We will start by looking for SMN1 in the Human Genome and sorting by name similarity.
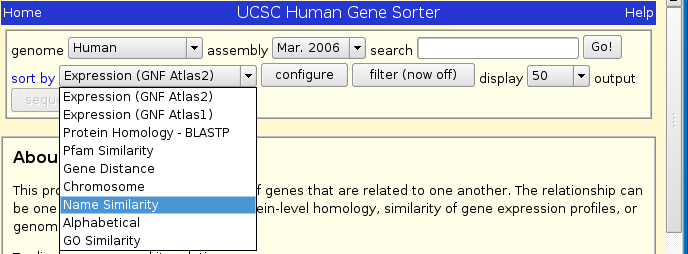
After you have selected Human Genome and sorting by name similarity, type SMN1 into the search box.

Press Go! and you should see the following page:
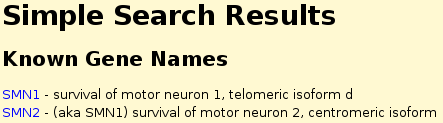
Click on SMN1 and you will be taking the gene expression atlas page.
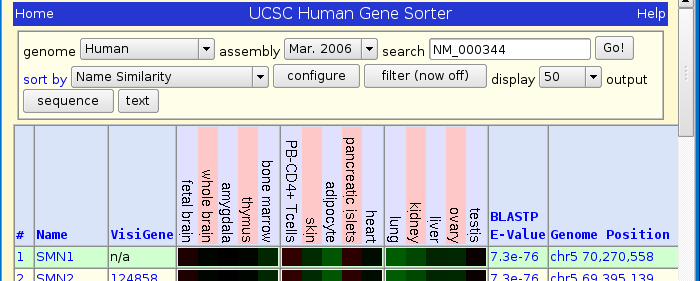
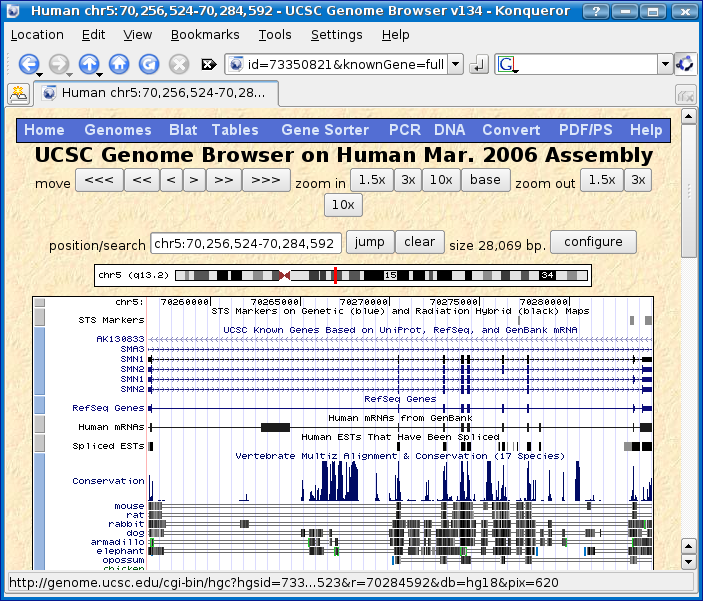
Click on chr5 70,270,558 found in the SMN1 row, Genome position column.
Now we have found the location of SMN1 on human!
Step 2 - Download CDS/UTR sequence for annotations
Since we have found SMN1, this would be a convenient time to extract the DNA sequence for the CDS and UTRs of the gene to use it as an annotation in Mussa.
Click on SMN1 shown between the two orange arrows shown below.
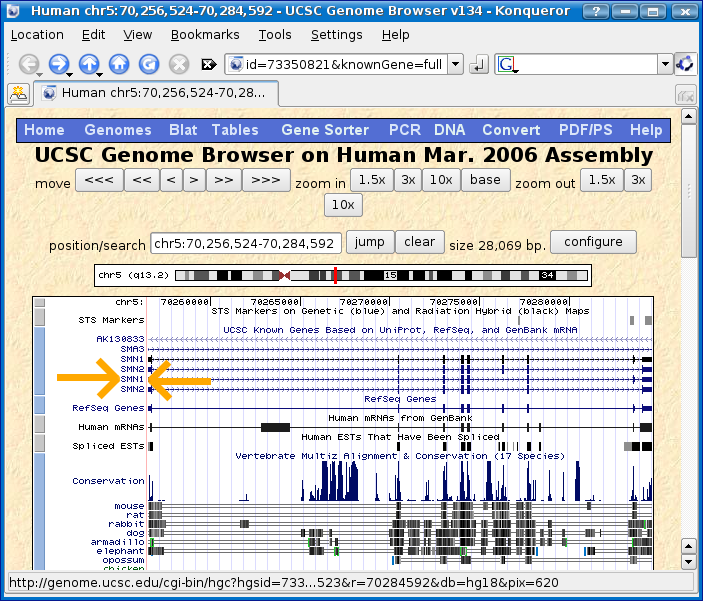
You should find yourself at the SMN1 description page.

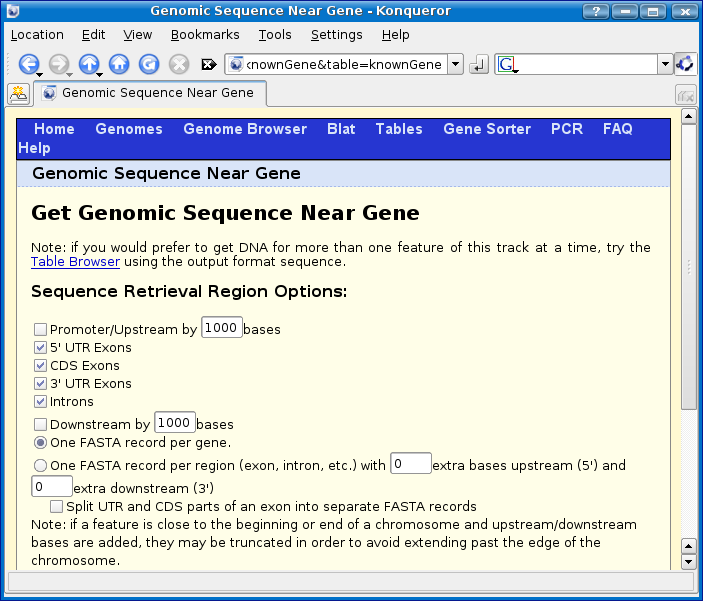
Scroll down until you get to the Sequence section and click on Genomic (chr5:70,256,524-70,284,592).

You should now be at the Genomic sequence near gene page:
Make the following changes (highlighted in orange in the screenshot below):
- UNcheck introns. (We only want to annotate CDS and UTRs.)
- Select one FASTA record per region. (Mussa needs each CDS and UTR represented by one FASTA record per CDS/UTR).
- Select CDS in upper case, UTR in lower case.
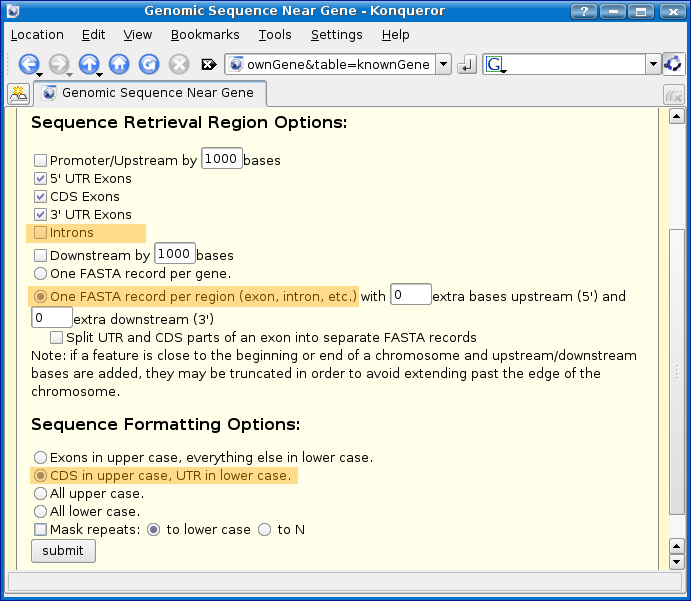
Now click the submit button. You will then see a FASTA file with many FASTA records representing the CDS and UTRS.
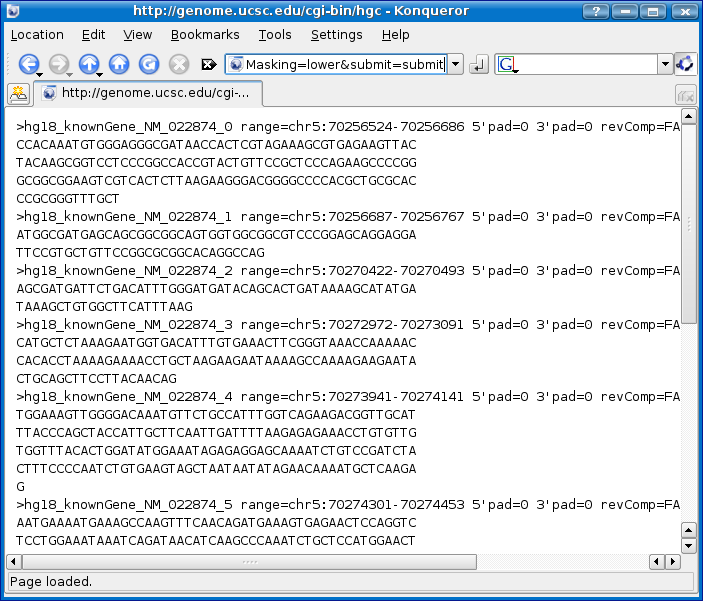
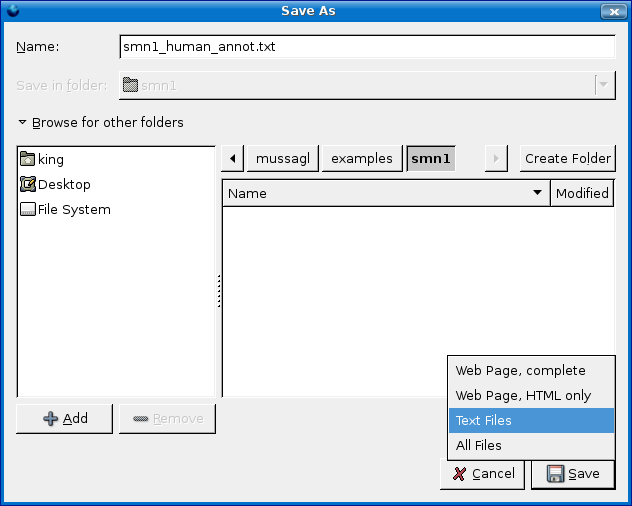
Now you need to save the FASTA records to a text file. If you are using Firefox or Internet Explorer 6+ click on the File > Save As menu option.
IMPORTANT: Make sure you select Text Files and NOT, I repeat NOT Webpage Complete (see screenshot below.)
Type in smn1_human_annot.txt for the file name.
- IMPORTANT: You should open the file with a text editor and make
- sure no HTML was saved... If you find any HTML markup, delete the markup and save the file.
Now we are going to modify the file you just saved to add the name of the species to the annotation file. All you have to do is add a new line at the top of the file with the word 'Human' as shown below:
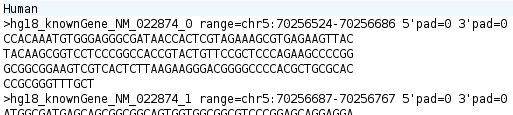
You can add more annotations to this file if you wish. See the annotation file format section for details of the file format. By including FASTA records in the annotation file, Mussa searches your DNA sequence for an exact match of the sequence in the annotation file. If found, it will be marked as an annotation within Mussa.
Step 3 - Download gene and upstream/downstream sequence
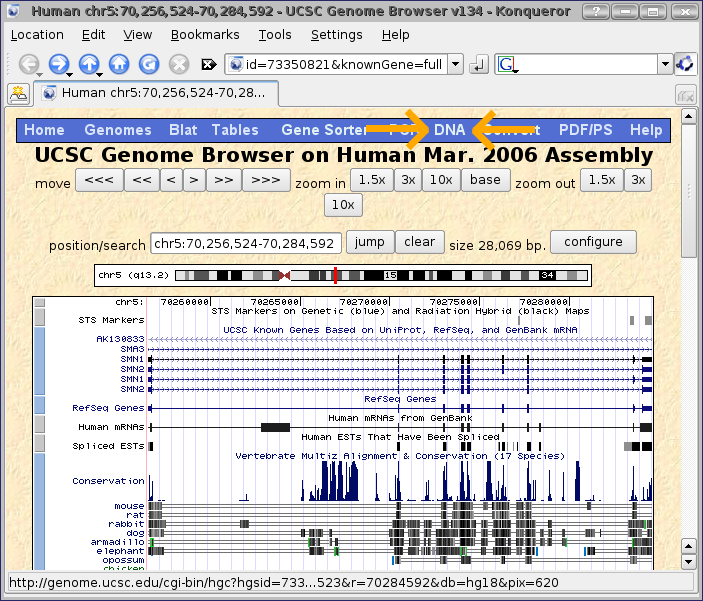
Use the back button in your web browser to get back the genome browser view of SMN1 as shown below.
There are two options for getting additional sequence around your gene. The more complex way is to zoom out so that you have the sequence you want being shown in the genome browser and then follow the directions for the following method.
The second option, which we will choose, is to leave the genome browser zoomed exactly at the location of SMN1 and click on the DNA option on the menu bar (shown with orange arrows in the screenshot below.)
Now in the get dna in window page, let's add an arbitrary amount of extra sequence on to each end of the gene, let's say 5000 base pairs.
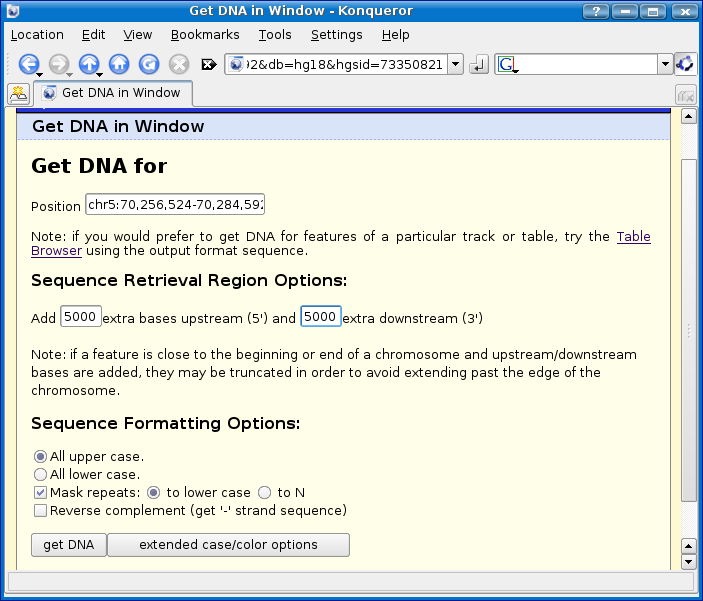
Click the get DNA button.
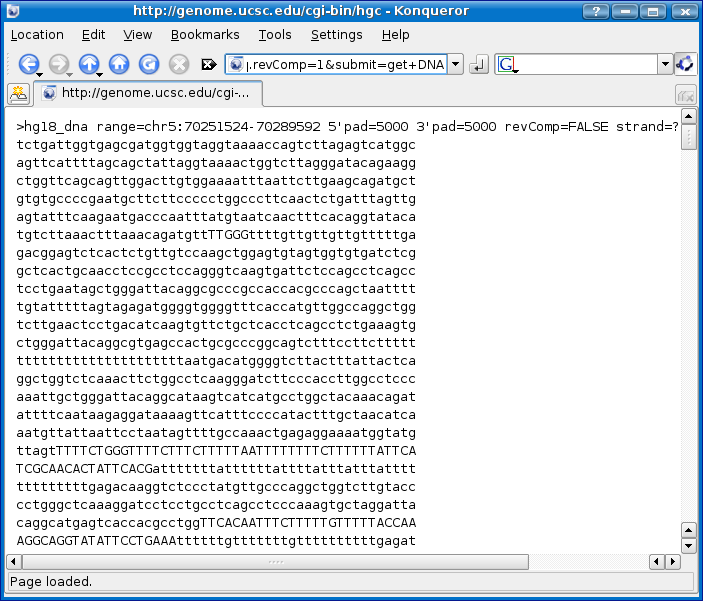
Save the DNA sequence to a text file called 'smn1_human_dna.fa' as we did in step 2 with the annotation file.
IMPORTANT: Make sure the file is saved as a text file and not an HTML file. Open the file with a text editor and remove any HTML markup you find.
Step 4 - Same/similar/related gene other species.
What good is a multiple sequence alignment viewer without multiple sequences? Let'S find a similar gene in a few more species.
Use the back button on your web browser until you get the genome browser view of SMN1 as shown below.
Click on SMN1 shown between the two orange arrows shown below.
You should find yourself at the SMN1 description page.
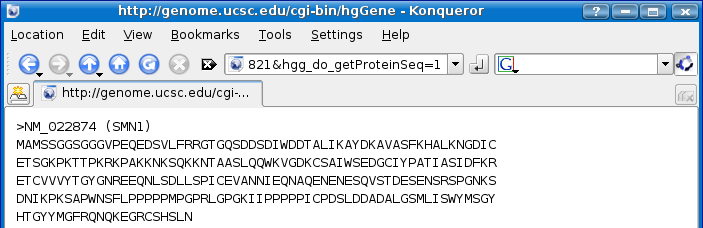
Scroll down until you get to the Sequence section and click on Protein (262 aa).
Copy the SMN1 protein seqeunce by highlighting it and selecting Edit > Copy option from the menu.
Press the back button on the web browser once and then scroll to the top of the page and click on the BLAT option on the menu bar (shown below with orange arrows).

Paste in the protein sequence and change the genome to mouse as shown below and then click submit.
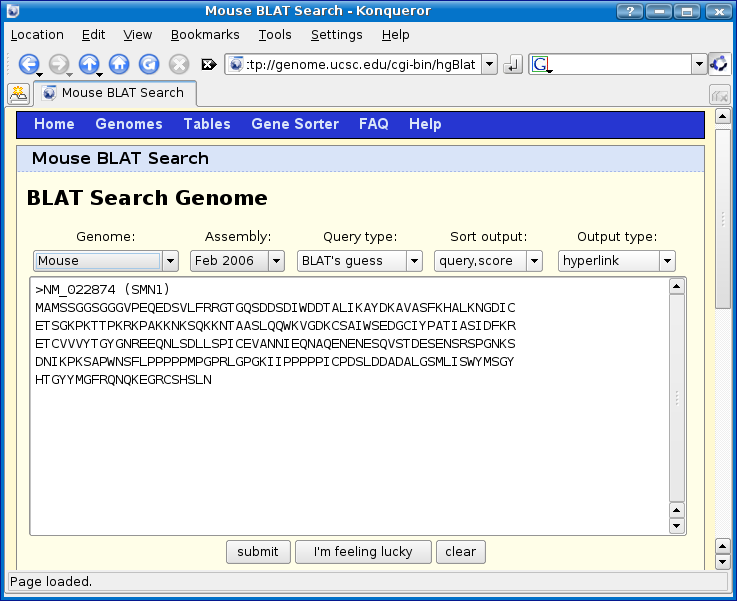
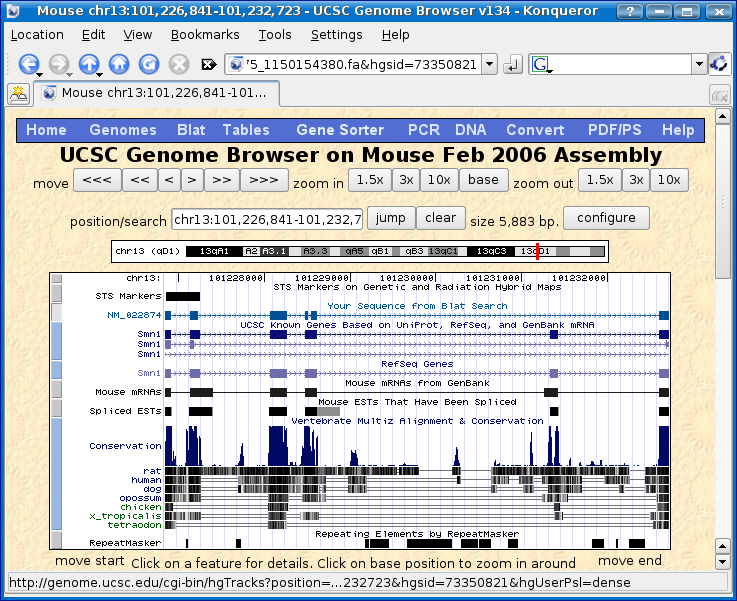
Notice that we have two hits, one of which looks pretty good at 89.9% match.
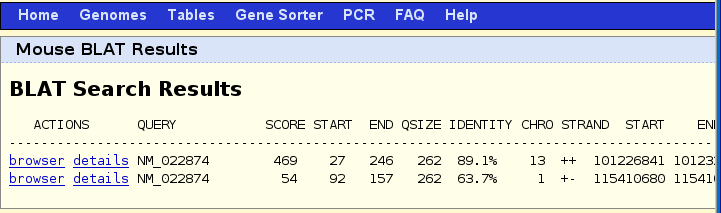
Click on the brower link next to the 89.9% match. Notice in the genome browser (shown below) that there is an annotated gene called SMN1 for mouse which matches the line called your sequence from blat search. This means we are fairly confidant we found the right location in the mouse genome.
Follow steps 1 through 3 for mouse and then repeat step 4 with the human protein sequence to find SMN1 in the following species (if you find a match):
- Rat
- Rabbit
- Dog
- Armadillo
- Elephant
- Opposum
- x_tropicalis
Make sure to save the extended DNA sequence and annotation file for each one.
Step 5 - Create Analysis
At this point you should have the annotations and fasta files for each species. If you skipped the first four steps or are having trouble, you can download the example data from the Mussa Example Data page.
There are two methods for creating an analysis. You can create MUssa PArameter file (.mupa), or you can use the create analysis dialog. To use the analysis dialog, see the create a new analysis section.
If you are planning on do lots of analyses using the same sets of DNA sequence but with different parameters, annotations, and/or species, it is often best to setup a mupa file, so you can:
- Change parameters and rerun analysis easily.
- Use Mussa command line option to run a batch analyses.
- Define an analysis for someone else to run.
Now, we will create a mupa file for smn1 for an analysis with Human, Mouse, and Cow. I'll start by showing you the mupa file and then walking you through it line by line.
Start by creating a new text file called smn1_human_mouse_cow.mupa, in your smn1 directory. I decided to put each of the fasta and annotation files for each species in it's own directory, so I will use that setup (see screen shot below).
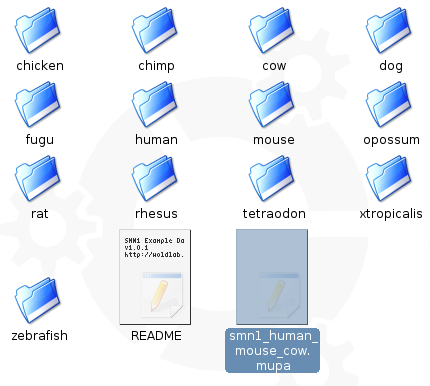
smn1_human_mouse_cow.mupa:
# Analysis name
ANA_NAME smn1_human_mouse_cow

# Appending to analysis name
APPEND_WIN true
APPEND_THRES true

# Human sequence
SEQUENCE human/smn1_human_dna.fasta
ANNOTATION human/smn1_human_annotations.txt

SEQUENCE mouse/smn1_mouse_dna.fasta
ANNOTATION mouse/smn1_mouse_annotations.txt

SEQUENCE cow/smn1_cow_dna.fasta
ANNOTATION cow/smn1_cow_annotations.txt

# Window size / Threshold
WINDOW 30
THRESHOLD 24
The first line is the analysis name. This will be the name of the directory the results will be saved in when using the Mussa command line option --no-gui to run an analysis. If you are using the Mussa GUI, then you will be prompted for a directory name as mentioned in the saving section.
# Analysis name
ANA_NAME smn1_human_mouse_cow
If your provide the APPEND_WIN and/or APPEND_THRES, and set them to true, the window size and threshold will be appended to the analysis name. In this example, using the --no-gui command line option, our directory name would be smn1_human_mouse_cow_w30_t24.
# Appending to analysis name
APPEND_WIN true
APPEND_THRES true
The following six lines provide Mussa with the location of the sequence files and annotation files. The files can provided with relative paths from the .mupa file. In other words, this .mupa file will provide the proper path to the human sequence only if there exists a directory called human in the same directory as this .mupa file.
To provide the species name for each species, you have to put the species name in the annotation files. See the annotation file format section for more details.
# Human sequence
SEQUENCE human/smn1_human_dna.fasta
ANNOTATION human/smn1_human_annotations.txt

SEQUENCE mouse/smn1_mouse_dna.fasta
ANNOTATION mouse/smn1_mouse_annotations.txt

SEQUENCE cow/smn1_cow_dna.fasta
ANNOTATION cow/smn1_cow_annotations.txt
And finally, the window size and threshold parameters.
# Window size / Threshold
WINDOW 30
THRESHOLD 24
Next, open Mussagl and select the File > Create Analysis from File menu option. Mussagl should run your analysis if everything was setup properly.
Understanding Mussa
Command Line
Mussa has some very useful command line options that allow for loading an existing analysis or running a new analysis with or without launching the GUI.
- Mussa options:
--help help message -p, --run-analysis arg run an analysis defined by the mussa parameter file --view-analysis arg load a previously run analysis --motifs arg annotate analysis with motifs from this file --no-gui terminate without running an analysis --python launch as a python interpreter
Running an analysis using the --no-gui option is useful when you want to run many analyses on a compute server and save the results for viewing in the future.
Performance
Repeats
Repeat masking of all input sequences, or at least of the "reference" genome, can be important for reducing compute time and for simplifying subsequent visual interpretation. Larger loci generally contain more repeat elements, and as their number grows so will the number of Mussa connections among them. If not repeat filtered, connectivity between shared repeat elements can obscure important relationships between single copy features.
The formula for the number of connections, C, that will be made for R instances of a single repeat (meaning R copies of one repeat in each sequence) and S sequences is:
C = (R^2)[S(S-1)/2]
Table of example situations:
| C | R | S |
|---|---|---|
| 16 | 4 | 2 |
| 48 | 4 | 3 |
| 96 | 4 | 4 |
| 160 | 4 | 5 |
| 240 | 4 | 6 |
| 336 | 4 | 7 |
| 448 | 4 | 8 |
| 24 | 2 | 4 |
| 54 | 3 | 4 |
| 96 | 4 | 4 |
| 150 | 5 | 4 |
| 216 | 6 | 4 |
| 294 | 7 | 4 |
| 384 | 8 | 4 |
| 2500 | 50 | 2 |
| 7500 | 50 | 3 |
| 15000 | 50 | 4 |
| 10000 | 100 | 2 |
| 30000 | 100 | 3 |
| 60000 | 100 | 4 |
After the connections, C, are found, they are passed on to the transitivity filter, which is a C^2 algorithm (FIXME: confirm algorithm is C^2). This means with 50 repeats in 2 sequences giving you a C of 2500, ends up with a C^2 of 6,250,000.
Conclusion: repeats cause the processing time of Mussa to skyrocket.
To deal with a situation where you have many repeats in your sequences do any of the following:
- Use shorter sequence lengths.
- Repeat mask one or more of your sequences.
- Increase the threshold.
Details
Case: Conservation track suddenly stops
Details about this potentially confusing case can be found here.
Python Interpreter
Mussagl has some functionality for running a python interpreter for interacting with the internals of Mussagl and/or executing Python code. This feature is mostly experimental at this point in time. If you have interest in this feature or would like to know more about it, contact us using the contact information found at http://mussa.caltech.edu/.